~*~ please note that See The World in PINK is taking a little vacation and I will return with posting on Tuesday, February 16, 2016 xoxo ~ *~
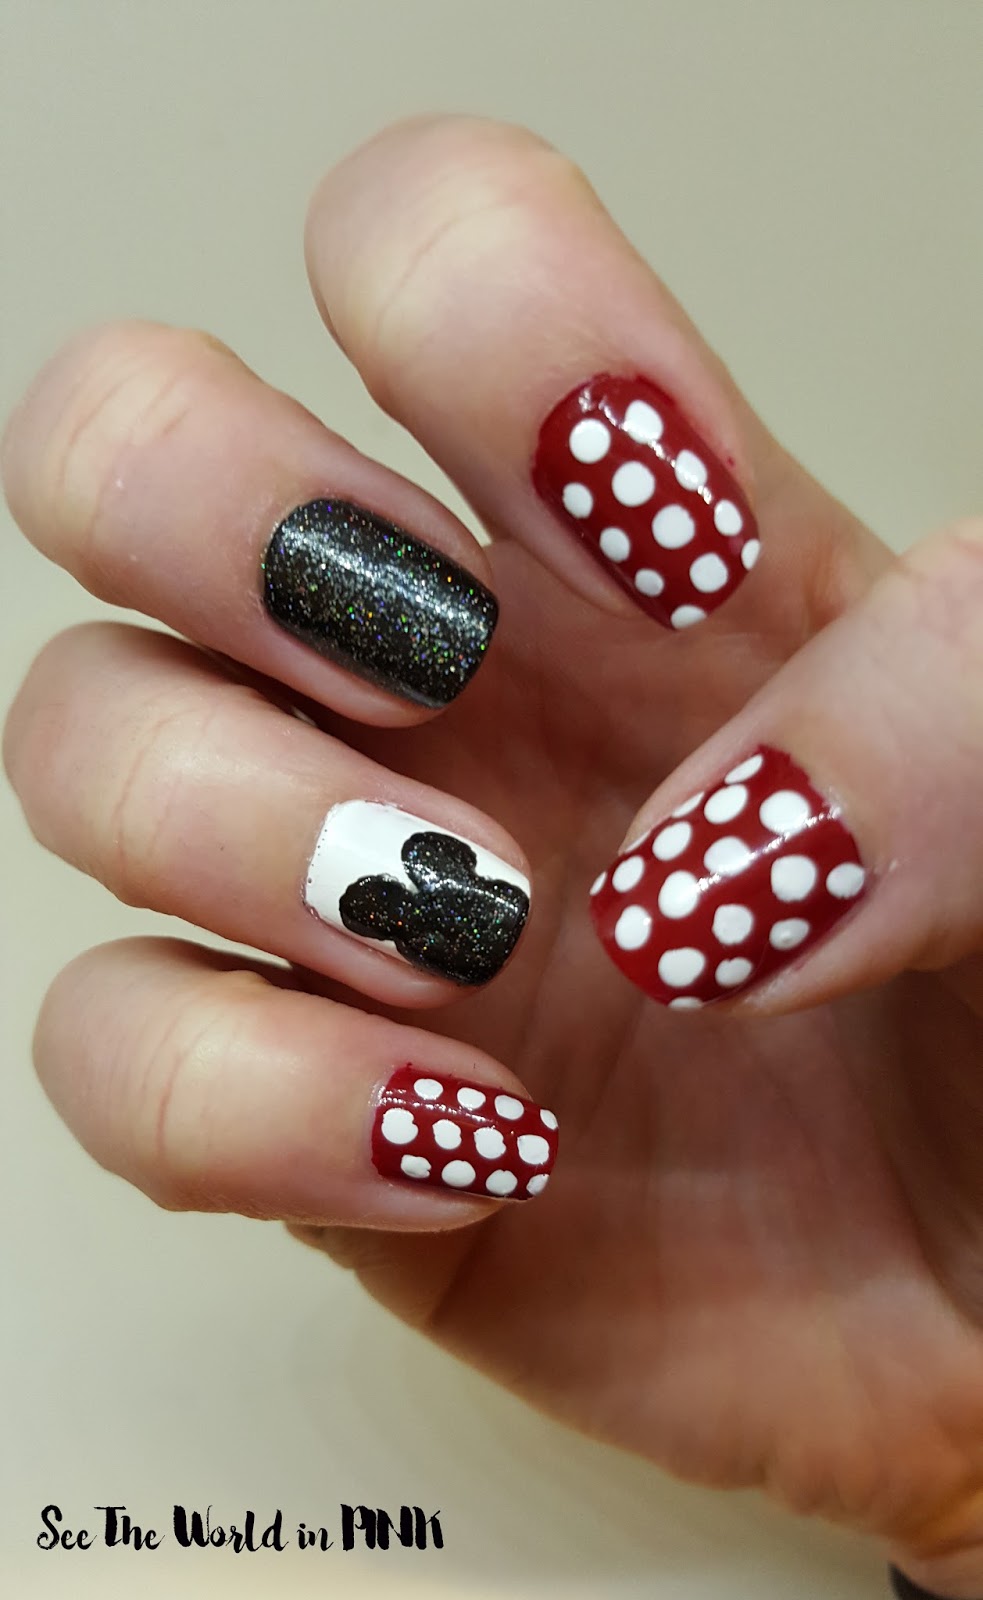
We are leaving tomorrow for Disneyland, so I thought it only fitting that I have some Mickey Mouse nails for the occasion!
I cannot take credit for this design myself, I found the design on Pinterest and have to give credit to "Being Genevieve"
It is so cute!
The steps I followed for the polka dot nails are:
1. Nail cleanser and top coat
2. 2 coats of red base polish
3. Using a nail dotting tool and white polish, create polka dots
4. Top coat!
For the black accent nail:
1. Nail cleanser and base coat
2. 2 coats of black polish
3. 1 layer of black/silver glitter
4. Top coat!
For the Mickey Mouse nail:
1. Nail cleanser and base coat
2. 2 coats of white polish - allow to dry very well!
3. Using a nail art brush or a dotting tool, create the Mickey Mouse head
5. Top coat!
This nail art was a little trickier for me! I tried it with a brush and could not get the shape right, so it was a little easier using a dotting tool instead! Sorry I didn't post a picture of the products I used, but I have explained it all!
See you guys next week!


These are the cutest ever!
ReplyDeletethank you!!!
DeleteSuch a cute mani! Have a wonderful trip!
ReplyDeleteThank you! It was awesome!
Delete